Getting Started With SpreadX
Last Update: 10-10-20231. Processing New Sale
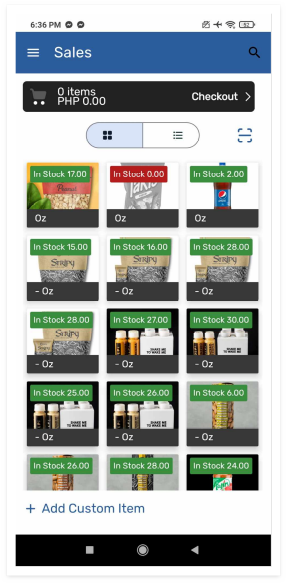
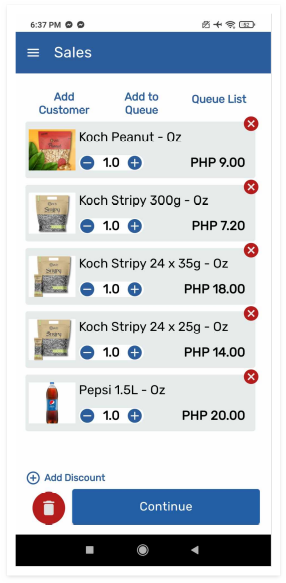
-- Navigate to the “Sales” section to start a new sale.
-- Add products by scanning barcodes or manually select items from the list to add to the cart.
2. Applying Discounts
-- Select items in the cart and apply discounts if applicable.
-- Specify discount types (percentage or fixed amount).
3. Payment Processing
-- Initiate checkout process by tapping “Checkout’ to proceed with payment processing.
-- Choose a payment method (cash, card, etc.).
-- Follow prompts to complete the transaction securely.
4. Adding Custom Items to Cart
-- Navigate to the "Sales" section of the application. This is where users typically manage items before finalizing a transaction.
-- At the bottom part of the screen, look for the “+ Add Custom Item” option.
-- Enter the amount or the custom item and select “Add to Cart”, to initiate the checkout process, select the “Checkout” button.
5. Adding Orders to Queue List
-- Initiate checkout process by tapping “Checkout’ to proceed with payment processing.
-- Select “Add to Queue” option to add the order to queue list.
-- Navigate to the "Queue List" section to access the queue list.
-- Here, you can view and manage transactions that are in progress or pending.
6. Customer Payment Process
-- When ready to complete the transaction, specify the customer's payment method (cash, card, etc.).
-- Process the payment using the chosen method.
-- If it's a cash transaction, enter the amount received and calculate change.
-- Generate and provide a receipt to the customer.